Dealing with pests in your home can be a real headache. Nobody wants creepy crawlies or rodents running around. Luckily, a lot of the time, you can handle these problems yourself without calling in the pros. This guide will walk you through how to tackle common household pests, keep your home safe, and save some money while you’re at it. We’ll cover everything from figuring out what kind of pest you have to using safe, effective do it yourself pest control methods.
Key Takeaways
- Understanding the bugs in your home helps you pick the right do it yourself pest control method.
- Keeping your home clean and sealing up cracks can stop pests before they even start.
- Natural and homemade remedies can be surprisingly good for do it yourself pest control.
- Always be careful when using any pest control stuff, especially if you have kids or pets.
- Sometimes, the problem is too big for do it yourself pest control, and that’s when you call a professional.
Understanding the Importance of Do It Yourself Pest Control

Pest control is more than just avoiding creepy crawlies. It’s about protecting your health, your property, and your wallet. Ignoring a pest problem can lead to some serious consequences, so understanding why DIY pest control is important is the first step in keeping your home safe and comfortable.
Health Risks Associated with Pests
Pests aren’t just annoying; they can actually make you sick. Many pests carry diseases that can be transmitted to humans through bites, droppings, or contamination of food. Think about it: rodents can spread diseases like Hantavirus, while cockroaches can trigger allergies and asthma. Flies can contaminate food with bacteria, leading to food poisoning. It’s not a pretty picture, and it’s definitely something you want to avoid.
- Rodents: Hantavirus, Leptospirosis
- Cockroaches: Allergies, Asthma
- Mosquitoes: West Nile Virus, Zika Virus
Property Damage Caused by Pests
Pests can do a number on your house. Termites can eat away at the wooden structure of your home, causing extensive and costly damage. Rodents will chew through electrical wires, which can create a fire hazard. They’ll also nest in insulation, ruining it and making your energy bills skyrocket. Even smaller pests like carpet beetles can damage your belongings. The damage can add up quickly, so it’s important to take action before it gets out of hand.
Ignoring a pest problem can lead to significant structural damage to your home. Termites, for example, can compromise the integrity of wooden beams and supports, leading to costly repairs. Rodents can also cause damage by gnawing on electrical wires, increasing the risk of fires.
Financial Implications of Unchecked Infestations
Let’s be real, pest control can be expensive. But letting an infestation go unchecked can be even more costly. The longer you wait, the more damage the pests will do, and the more expensive it will be to fix. Plus, some pests, like termites, can cause so much damage that they can actually decrease the value of your home. Regular pest control mixtures can save you money in the long run by preventing major problems from developing.
- Increased repair costs
- Decreased property value
- Higher energy bills due to damaged insulation
Recognizing Pests in Your Home
It’s super important to know what critters are crashing at your place uninvited. Knowing your enemy, so to speak, is the first step in kicking them out. Different pests leave different clues, so becoming a bit of a detective is key.
Identifying Common Household Pests
Okay, so who are the usual suspects? We’re talking ants, roaches, rodents, and maybe even termites if you’re really unlucky. Each one has its own quirks. For example, ants are all about that sugar life, cockroaches love dark and damp spots, and rodents? They’ll chew through anything to make a cozy nest. Knowing what common household pests look like and what they’re after is half the battle.
Signs of Pest Infestation
Spotting the signs early can save you a ton of headache (and money) down the road. Here’s what to look for:
- Droppings: Mouse poop is pretty distinctive, and roach droppings look like coffee grounds. Yuck.
- Nests: Shredded paper or fabric? Could be a rodent nest. Mud tubes on your foundation? Termites.
- Damage: Chewed-up food packaging, holes in walls, or damaged wood are all red flags.
- Strange Smells: A musty or oily odor can indicate a rodent infestation.
It’s easy to miss the early signs of pests. Make it a habit to check under sinks, in pantries, and along baseboards regularly. A quick peek can prevent a full-blown invasion.
Tracking Pest Activity
Where are these pests hanging out? Are you seeing ants marching in a straight line to that spilled juice on the counter? Are there signs of infestation in your pantry? Knowing where they’re active helps you target your pest control efforts. Set up some sticky traps or even a cheap webcam to monitor their movements. Understanding their patterns will make your DIY pest control way more effective.
Preventative Measures for Do It Yourself Pest Control
Sealing Entry Points
Okay, so first things first, you gotta think like a bug. How are they getting in? Cracks, gaps, holes – they’re like little highways for pests. Sealing these entry points is a huge step in preventing infestations. I spent a weekend caulking around my windows and doors, and it made a noticeable difference.
Here’s a quick rundown of common entry points and how to deal with them:
- Cracks in walls: Use caulk or sealant.
- Gaps around pipes: Use expanding foam.
- Openings around windows and doors: Weatherstripping is your friend.
- Unscreened vents: Install screens.
Maintaining Home Cleanliness
This one seems obvious, but it’s super important. Pests are attracted to food and water sources. If your house is a buffet, they’re gonna RSVP. I try to clean up spills right away, and I never leave dirty dishes in the sink overnight. It’s not always easy, especially with kids, but it’s worth the effort. Make sure you’re taking out the trash regularly, too.
A clean home is a less attractive home for pests. Simple as that. Regular cleaning disrupts their food supply and eliminates breeding grounds.
Landscape Maintenance for Pest Prevention
Your yard can be a breeding ground for pests that eventually make their way inside. Keep bushes and shrubs trimmed back so they don’t touch your house. Pests can use them as bridges to get inside. Also, remove any standing water, like in bird baths or old tires. Mosquitoes love that stuff. I also try to keep my lawn mowed regularly. Tidy landscaping is a great way to practice pest control.
Here’s a little table to help you visualize:
| Task | Frequency | Benefit |
|---|---|---|
| Mow lawn | Weekly | Reduces harborage for pests |
| Trim shrubs | Monthly | Prevents pests from reaching your house |
| Remove standing water | As needed | Eliminates mosquito breeding grounds |
Effective Do It Yourself Pest Control Methods
So, you’re ready to roll up your sleeves and take on those pests yourself? Awesome! There are actually a bunch of ways to handle things without calling in the pros. It’s all about knowing what works and how to use it safely. Let’s jump into some effective DIY methods.
Utilizing Natural Repellents
Natural repellents are a great first line of defense. They’re often safer for your family and pets than chemical options. I’ve had some good luck with these, and they can be surprisingly effective. For example, I’ve found that certain scents really do keep pests away. Here are a few ideas:
- Essential Oils: Peppermint, lavender, and eucalyptus oils can repel ants, spiders, and mosquitoes. Just dilute them with water and spray around problem areas.
- Herbs: Planting things like basil, mint, and rosemary around your home can naturally deter pests.
- Diatomaceous Earth: This natural powder is safe for humans and pets but deadly to insects. It dehydrates their exoskeletons. Sprinkle it around areas where you see pests.
Using natural repellents is not only effective but also environmentally friendly. It’s a win-win! Plus, your house will smell great.
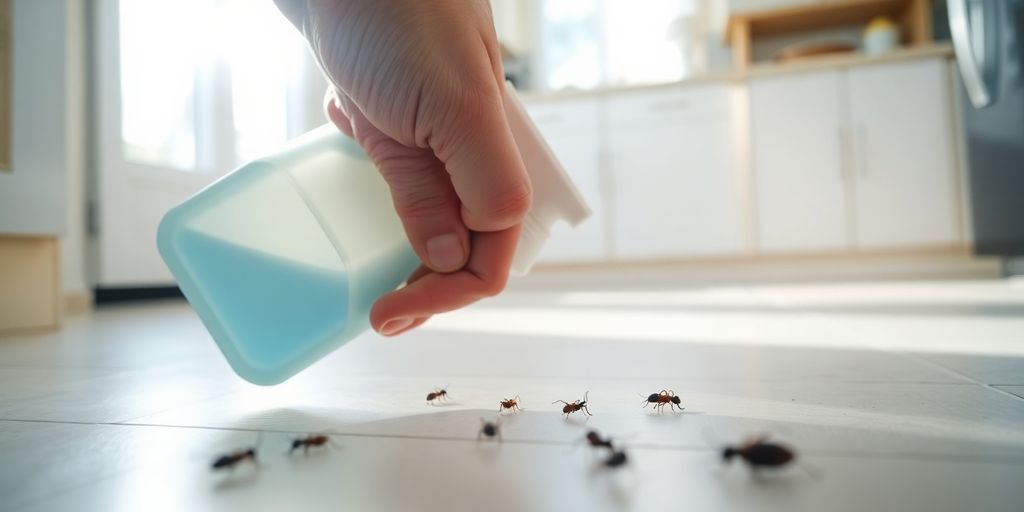
Preparing Homemade Pest Control Mixtures
Okay, now let’s get into some DIY concoctions. These homemade mixtures can be surprisingly effective, and you probably already have most of the ingredients in your kitchen. One thing I’ve learned is that DIY baits can be super effective. Here are a couple of recipes I’ve tried:
- Ant Killer: Mix equal parts sugar and borax with water. Soak cotton balls in the mixture and place them near ant trails. The sugar attracts the ants, and the borax kills them.
- Roach Repellent: Combine baking soda and sugar. The sugar attracts roaches, while the baking soda messes with their digestive system.
- Vinegar Spray: Mix equal parts white vinegar and water in a spray bottle. This works great for killing ants and other crawling insects. Just spray directly on them.
Employing Electronic Pest Control Devices
Electronic pest control devices are another option to consider. These range from ultrasonic repellers to bug zappers. I’ve experimented with a few, and here’s what I’ve found:
- Ultrasonic Repellers: These devices emit high-frequency sound waves that are supposed to repel pests. Some people swear by them, but the effectiveness can vary. It really depends on the type of pest and the specific device.
- Bug Zappers: These are great for attracting and killing flying insects like mosquitoes and moths. Just be aware that they can also attract beneficial insects, so use them judiciously.
- Electronic Traps: Some traps use light or bait to lure pests and then trap or kill them electronically. These can be effective for certain types of pests, like rodents or flies.
| Device | Pests Targeted | Effectiveness | Considerations |
|---|---|---|---|
| Ultrasonic Repeller | Rodents, Insects | Variable | May not work on all pests; placement is key. |
| Bug Zapper | Flying Insects | High | Can attract beneficial insects. |
| Electronic Trap | Various | Medium | Requires monitoring and emptying. |
Safe Application of Do It Yourself Pest Control Techniques
DIY pest control can be a great way to save money and manage minor pest problems. However, it’s super important to do it safely! You don’t want to accidentally harm yourself, your family, or your pets. Always read and follow the instructions on any product you use, even if it seems simple. Let’s go over some key safety measures.
Protective Gear and Safety Precautions
When you’re mixing or applying any kind of pest control product, always wear protective gear. This usually means:
- Gloves: Protect your hands from chemicals.
- Long sleeves and pants: Cover your skin to avoid irritation.
- Eye protection: Goggles or safety glasses will keep splashes out of your eyes.
Also, be careful when you’re working in tricky spots. Make sure you have good footing and aren’t reaching too far. It’s easy to slip or fall when you’re focused on getting rid of those pesky ants. Proper pest identification is also important before choosing a pesticide.
Safe Storage and Disposal of Supplies
After you’re done with your pest control project, you need to store any leftover supplies safely. This is really important if you have kids or pets. Here’s what to do:
- Keep products in their original containers: Don’t transfer them to unmarked bottles.
- Store them in a locked cabinet or high shelf: Make sure kids and pets can’t reach them.
- Check the labels for disposal instructions: Some products have specific rules for getting rid of them.
It’s better to be safe than sorry when it comes to storing and disposing of pest control supplies. A little extra caution can prevent accidents and keep everyone in your home safe.
Considerations for Pets and Children
Kids and pets are curious, so you need to be extra careful when using pest control products around them. Here are some tips:
- Keep them away from treated areas: Don’t let them near until the product is dry or has settled.
- Use pet-friendly products when possible: Look for options that are specifically designed to be safe for animals.
- Store all products out of reach: Even if you think they can’t get to them, it’s better to be safe. Consider using electronic pest control devices as a safer alternative.
By taking these precautions, you can effectively manage pests while keeping your loved ones safe.
When to Call a Professional for Pest Control

Okay, so you’ve been battling those creepy crawlies yourself. You’ve tried the sprays, the traps, maybe even some weird home remedies you found online. But sometimes, you just gotta admit defeat and call in the pros. It’s not a sign of weakness, trust me. It’s about protecting your home and your sanity.
Limitations of Do It Yourself Pest Control
DIY pest control can be great for small problems, but it has its limits. Think of it like this: a band-aid works for a small cut, but you need stitches for something serious. DIY methods often only address the surface issue, not the root cause of the infestation. Plus, some pests are just plain stubborn and resistant to over-the-counter treatments. You might be wasting time and money on solutions that simply aren’t strong enough. Also, if you don’t use them correctly, you could be putting your family at risk.
- DIY solutions might not fully tackle the root of the problem.
- They can pose health risks if not appropriately used.
- Assessing the extent of the infestation is crucial before deciding on DIY.
DIY pest control is a good starting point, but it’s important to be realistic about what you can achieve. If you’re not seeing results, or if the problem seems to be getting worse, it’s time to consider other options.
Recognizing Advanced Infestations and Hazards
How do you know when it’s gone beyond a simple DIY fix? Look for the signs of a serious infestation. Are you seeing pests everywhere, even during the day? Is there damage to your home, like chewed wires or holes in the walls? Are there unpleasant odors that you can’t get rid of? These are all red flags. Also, consider the type of pest you’re dealing with. Some pests, like termites, can cause serious structural damage if left unchecked. Others, like rodents, can spread diseases. And if you’re dealing with stinging insects like wasps or bees, it’s best to leave it to the professionals to avoid getting hurt. If you notice multiple pest sightings, it’s time to call someone.
Benefits of Professional Pest Control Services
So, what do you get when you hire a professional? For starters, they have the knowledge and experience to accurately identify the pest and determine the extent of the infestation. They also have access to specialized equipment and treatments that aren’t available to the general public. This means they can get rid of the pests quickly and effectively. But it’s not just about killing bugs. Professional pest control is also about prevention. Many companies offer ongoing service plans to keep your home pest-free year-round. Plus, they can offer advice on how to prevent future infestations, like sealing entry points and improving sanitation. Hiring a pest control company can give you peace of mind.
| Benefit | Description
Conclusion
So, there you have it. Taking care of pests yourself can really work out. It saves money, and you get to be in charge. Just remember to figure out what kind of pests you’re dealing with, keep your place clean, and use the right stuff. Sometimes, though, things get out of hand. If that happens, don’t be afraid to call in the pros. They’ve got the tools and know-how for bigger problems. The main thing is to keep your home safe and comfy for everyone living there.
Frequently Asked Questions
What exactly is DIY pest control?
DIY pest control is when you handle pest problems in your home yourself, using methods like natural sprays, traps, or store-bought products, instead of hiring a professional. It’s often cheaper and quicker for small issues.
Why is it important to control pests in my home?
It’s super important! Pests can spread diseases, mess up your house, and cost you a lot of money in repairs if you let them stick around. Keeping them out makes your home healthier and safer.
How can I tell if I have pests and what kind they are?
Look for clues like tiny droppings, chew marks on food containers or wires, strange smells, or even seeing the pests themselves. Knowing what kind of pest you have helps you pick the right way to get rid of them.
What are some easy ways to stop pests from coming into my house?
You can seal up cracks and holes in your walls and around pipes, keep your house really clean, and make sure your yard is tidy. These steps make it harder for pests to get in and find food or shelter.
What are some simple DIY methods to get rid of common pests?
You can try natural sprays made from essential oils like peppermint, use traps, or even homemade mixtures. Always read labels carefully and be sure to keep kids and pets away from any pest control stuff.
When should I stop trying DIY methods and call a professional pest control service?
If you have a lot of pests, they keep coming back, or they’re dangerous (like wasps or termites), it’s best to call a professional. They have special tools and knowledge to handle big problems safely and effectively.